|
Pillard Model #3, New Britain Bank Lock Co., New Britain, Connecticut Restoration page.
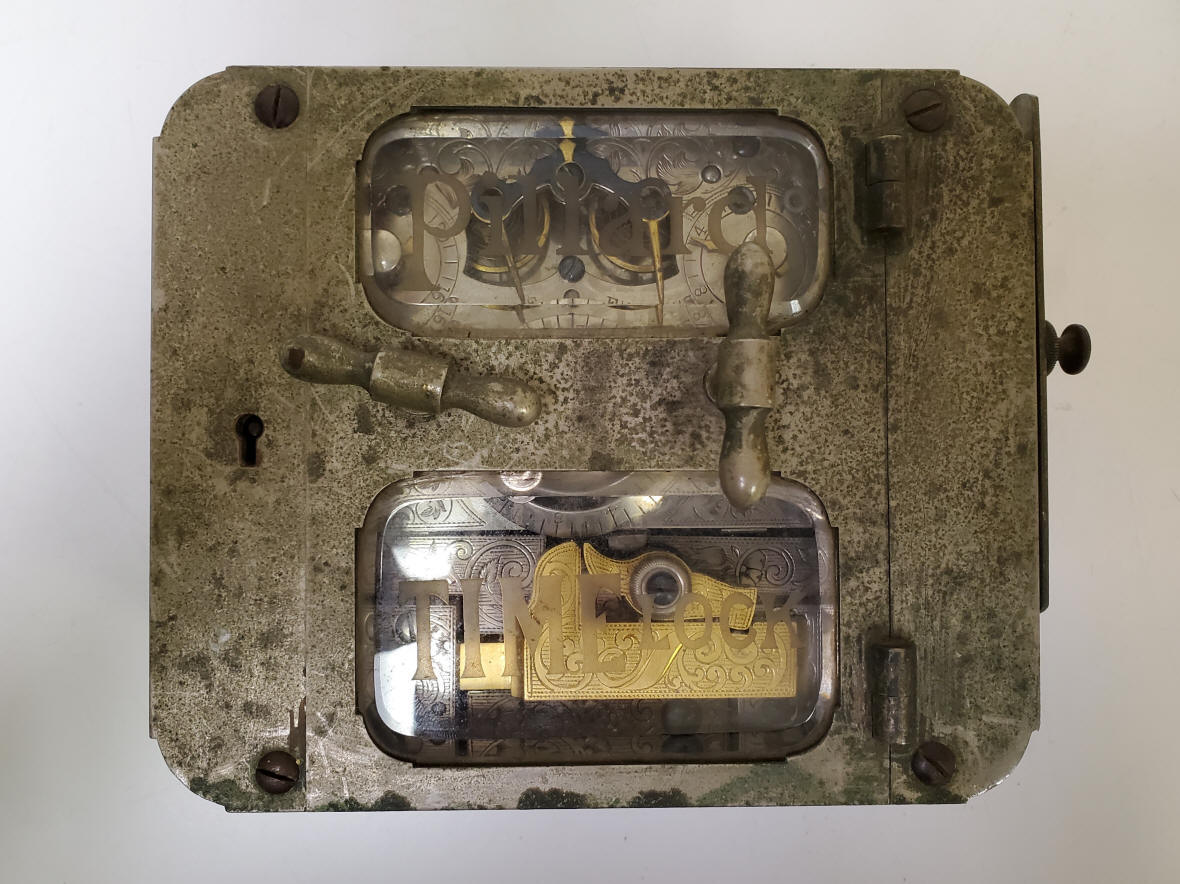
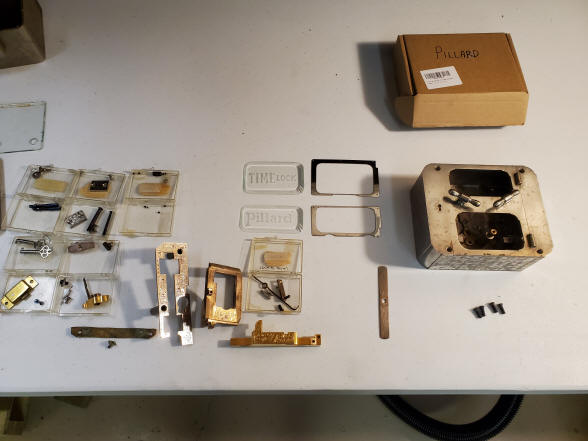
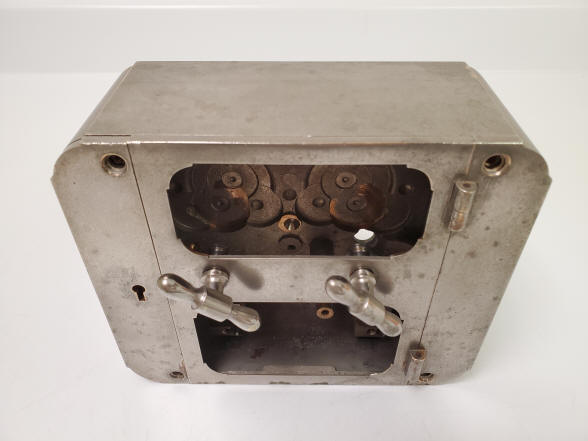
The time lock in "as received" condition. The case surface had extensive corrosion and was impossible to bring back to good condition. Only the rarity of this time lock made the effort worthwhile.
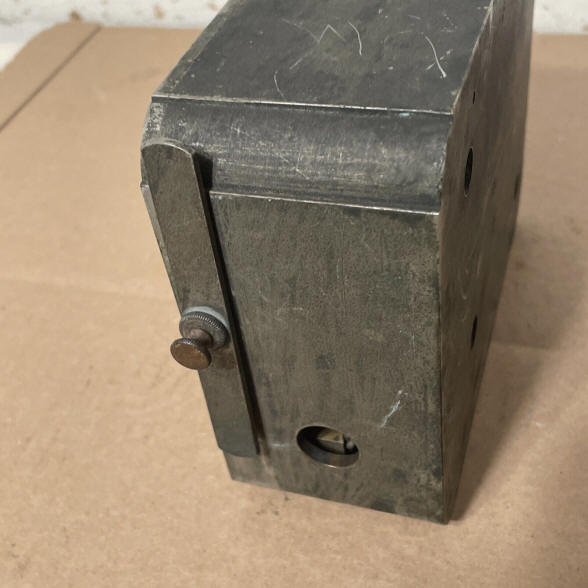
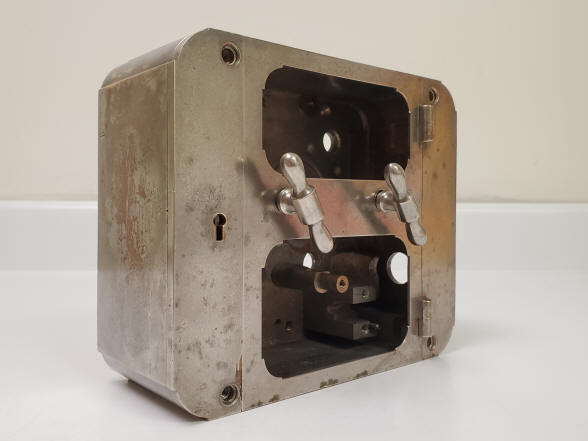
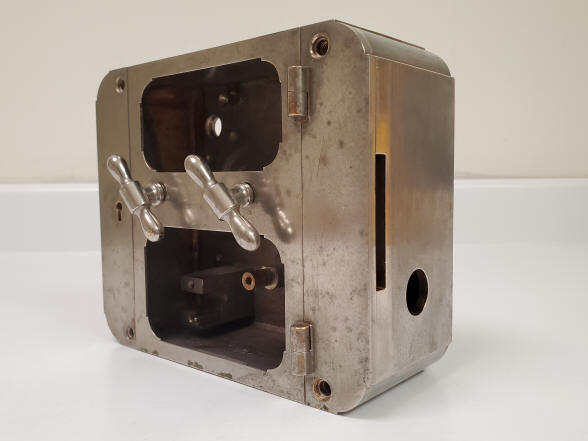
Left and right side elevations of the case.
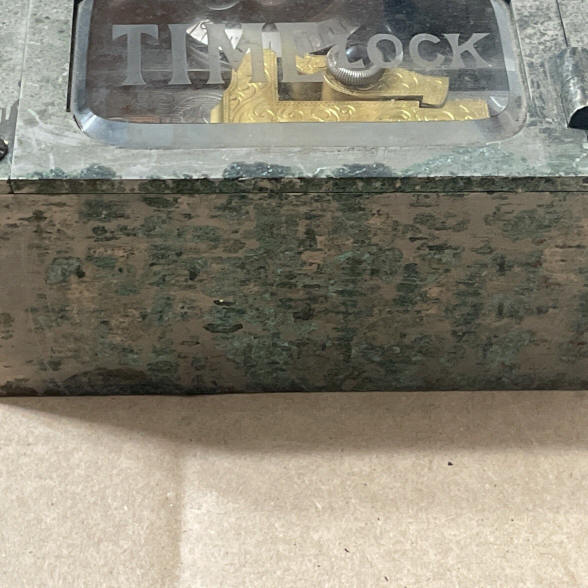
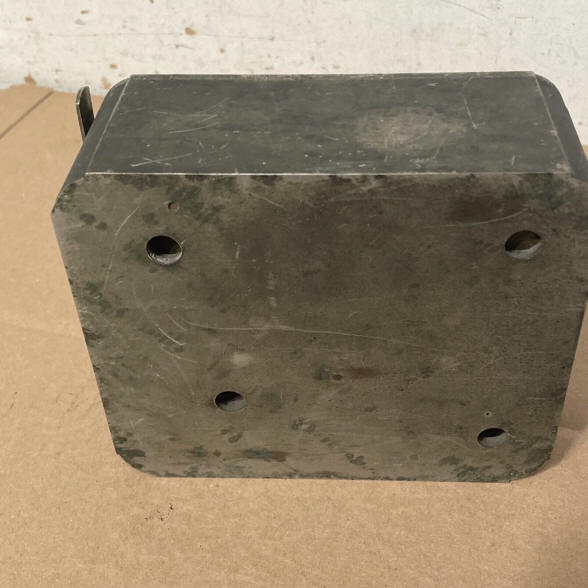
The bottom of the case had the worst corrosion conditions. Fortunately this was only to this extent on the bottom or it would have been impossible to have brought the case to anywhere near a presentable state.
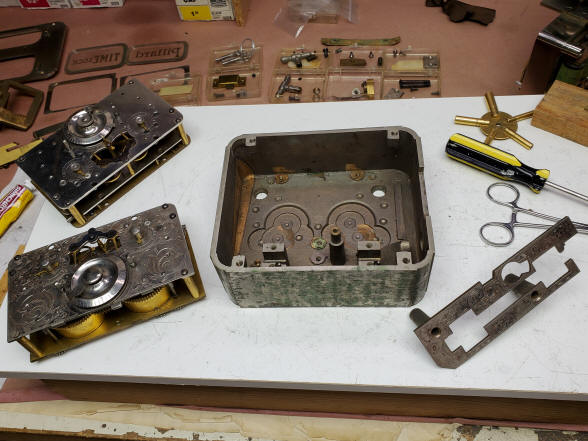
Fortunately the damage did not extend to the inside of the lock.
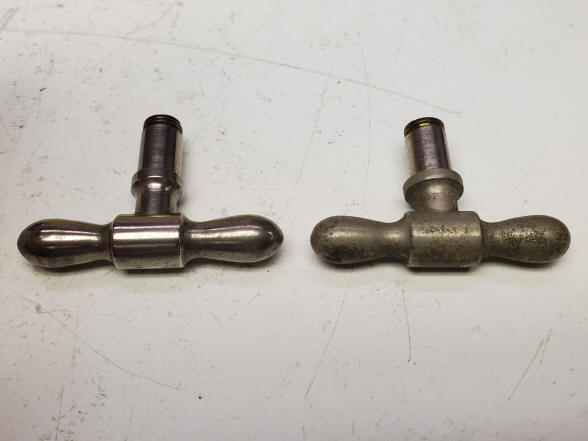
I now begin disassembly. I had a spare movement of the same model as in this lock although without the front plate engraving. This proved beneficial in learning how to restore the movement in this lock. Next the pair of door winding handles, the left after restoration.
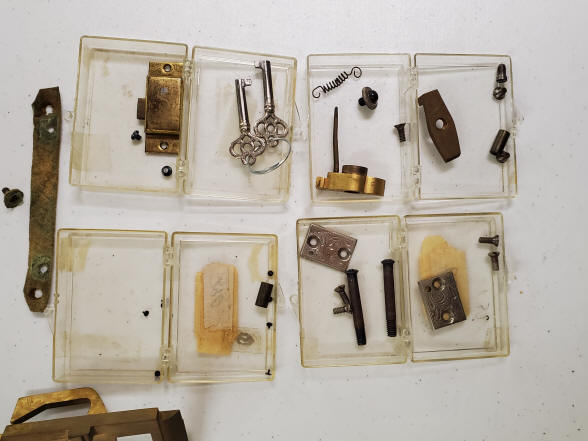
These two photos show the various parts associated with the case and locking mechanisms, everything but the movement. All of these parts were cleaned in the ultrasonic tank. Silver metal surfaces such as screws that were not originally blued were cleaned and polished to a medium standard. It makes no sense to make a high polish when the rest of the lock is not pristine. Screws that were originally blued and underwent subsequent corrosion were cleaned, polished and re-blued.
These photos show the case after restoration. There is a lot of 'elbow grease' needed to do this - all by hand. First all the case parts are put into an ultrasonic tank with a cleaner to remove all dirt and grease. Then steel wool grade 0000. One might think this is radical, but the case was originally plated in chrome which is much harder than the steel wool and so is impervious to scratching from such a fine grade of steel wool if used carefully! Of course one has to be careful not to apply too much pressure, slow and careful is needed. The trick is not to work the edges too much as the base bronze metal from which the case is made will show through. Still, given the extent of corrosion some exposure was inevitable. The steel wool deals with most of the corrosion. Some places where a true, deep green verdigris occurred there was not much that could be done since this was the corrosion of the bronze base metal. Examples of this can be seen at the bottom edge of the door and was extensive on the bottom surface of the case - no doubt due to the case sitting on a moist surface for a very long time. The use of steel wool is never used in a job where the lock is in good condition.
Fortunately the verdigris did not extend to any other case surfaces. The next step is polishing with Simichrome ®. This leaves a fair surface. Even so, there are areas where the original chrome finish was worn or corroded away and even peeled off.
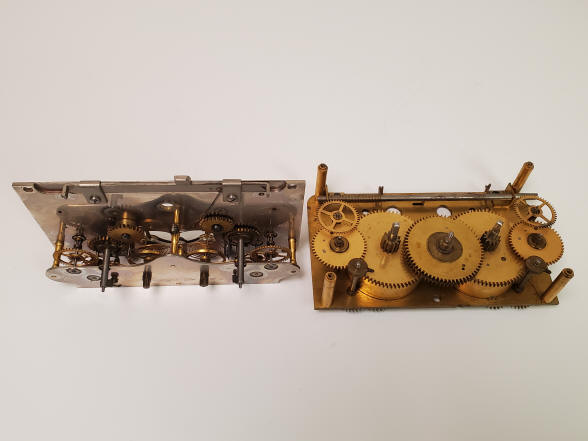
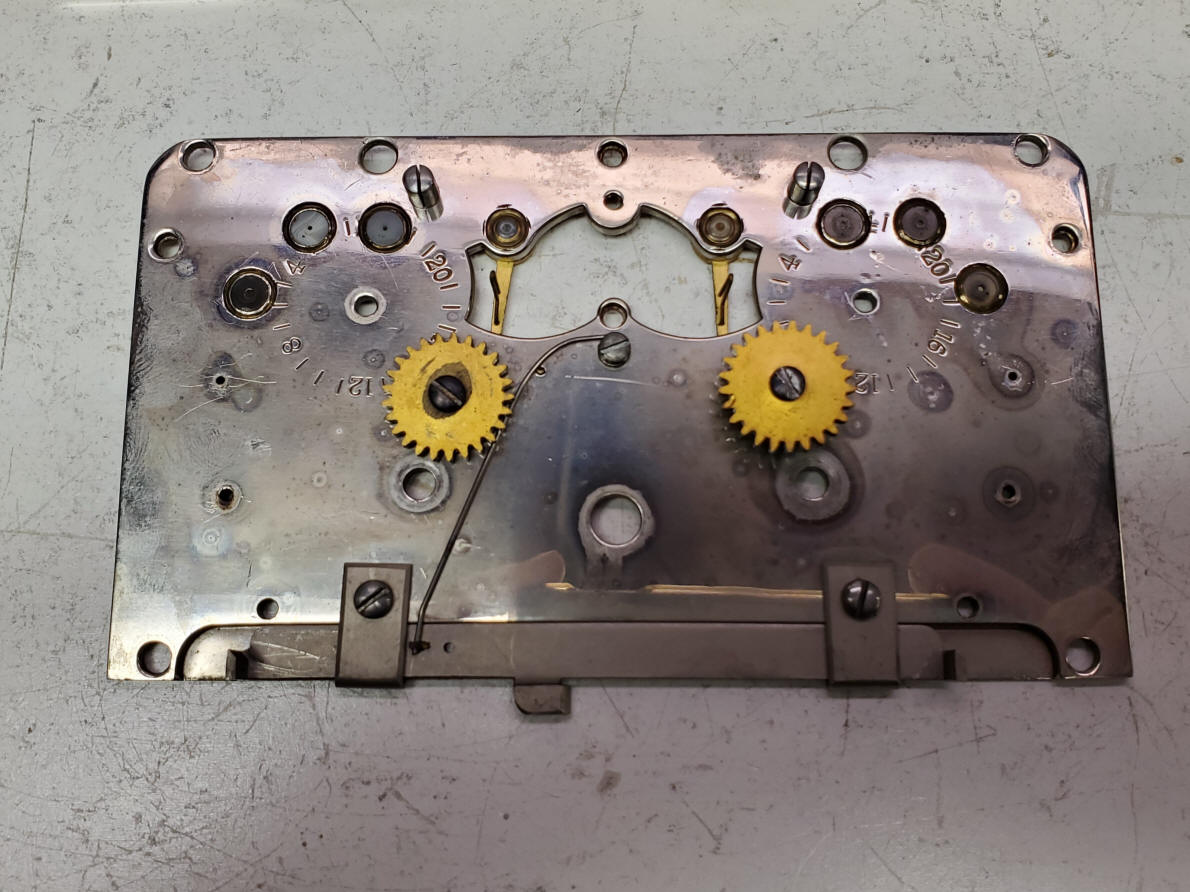
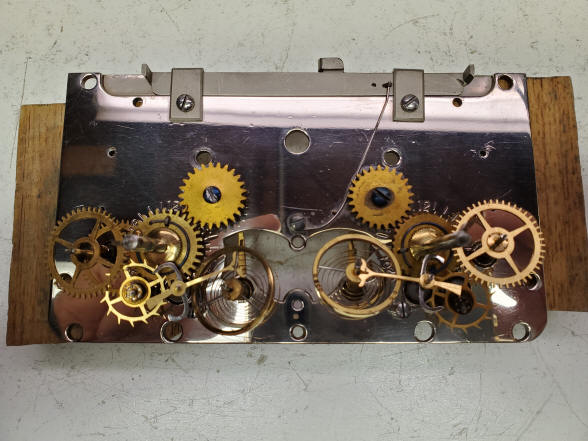
I now turn to the movement. It is a triple plate design. The first photo shows the main plates separated. The left plate contains the dual escapements and duration dials. To the right the clockworks that drive those escapements along with the gearing behind the main control dial and emergency (fail-safe) bolt release slider. The second photo shows a close up of the front main plate with the third internal subplate containing the two independent escapements.
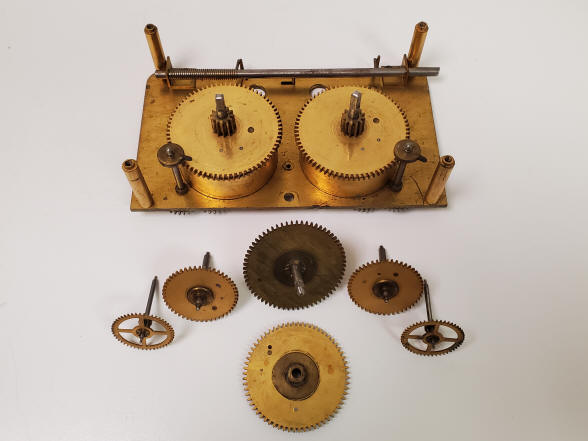
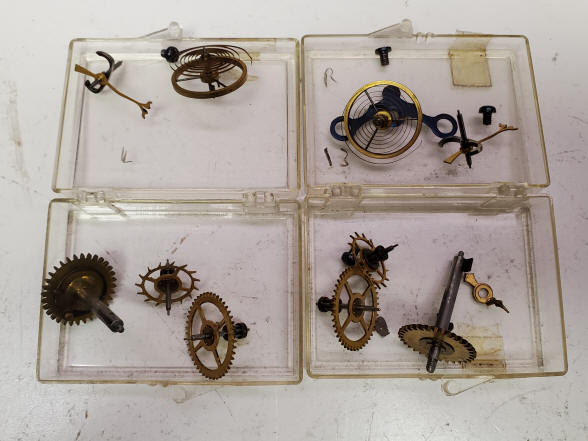
The drive clockwork partially disassembled. Next the escapement parts ready for cleaning.
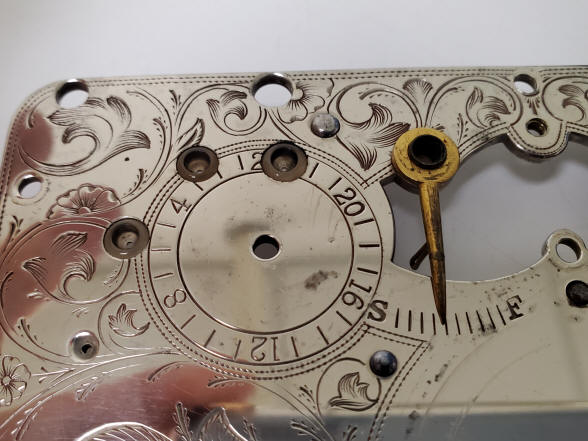
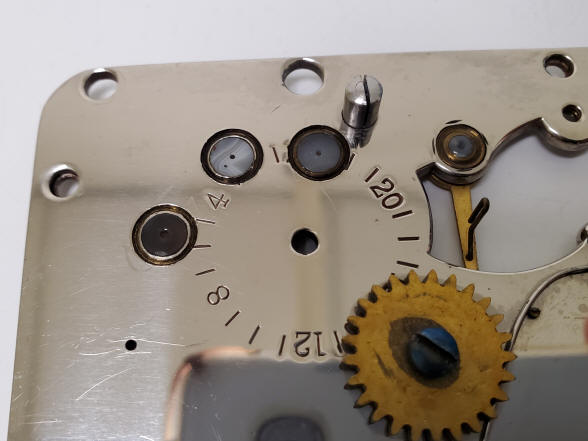
This photo shows the inside surface of the front engraved plate. The inner frame has been removed. Notice the circular engraving on both the right and left upper quadrants. They are the beginnings of the duration dials that appear on the front. Could these have been practice engravings? Or were they accidentally begun on the wrong side of the plate? Unlike most movement plates the holes here are perfectly symmetrical so the front and rear would look the same, only the slot indentation on the bottom edge for the fail-safe slider betrays the orientation.
These photos show the front, completed duration dial engravings and the rear 'practice' engraving.
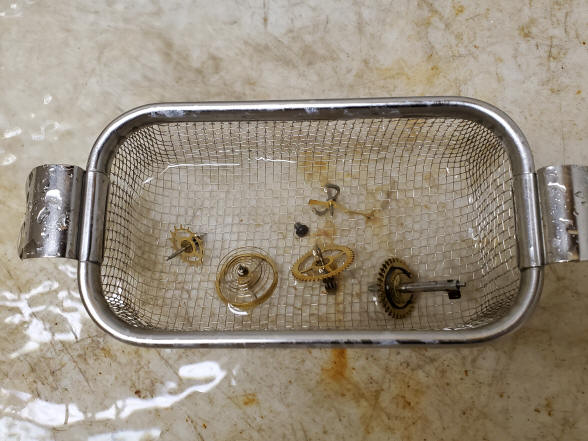
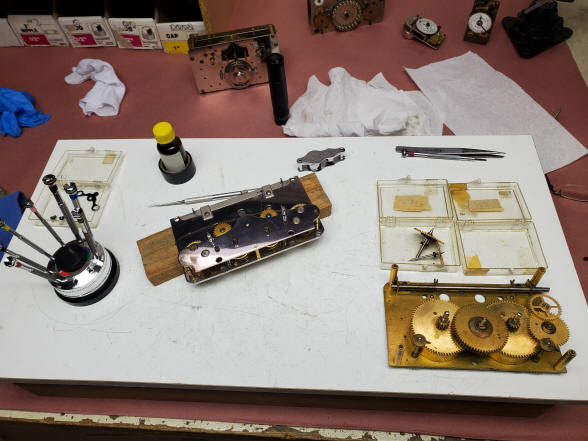
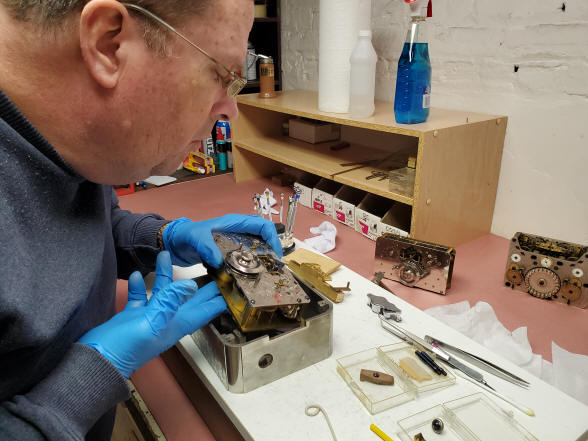
Movement components are first cleaned and then rinsed in the ultrasonic machine.
The escapement parts are ready for reassembly. From this point on latex gloves are worn to keep the plates pristeen. Next the subplate is assembled. One of the trickiest things to do after assembly is the attachment of the balance wheel hairsprings to obtain proper poising of the balance wheels. On most movements the end of the spring that attaches to the balance cock or frame post has a small plug permanently attached. That plug slides into a hole that has a threaded grub screw on the side to secure the plug and thus the spring. The plug is located on the area of the spring that is pre-set for correct poising and keeping the spiral spring flat. Unfortunately in this movement the end of the spring is secured in a slotted post and then secured with a small wedge. This means one must not only find the exact place on the spring to provide poising, but also make sure the spring is positioned in such a way as to not distort the spiral helix - to keep it flat; all while driving the wedge home which, of course, invites changes that disturb these criteria.
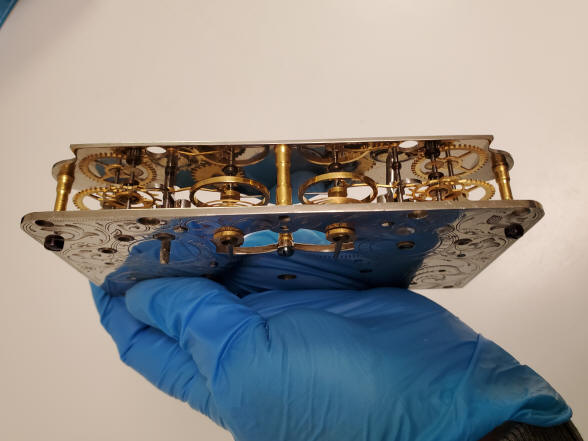
First photo the balance pivots and escapement pallets are now ready for oiling within the subplate and front plate, center of photo. I use Moebius 9010 on these areas and will later use this on the escape wheel pivots. This is a rather large movement so Moebius 8040 is used for all the wheel pivots further down the train. On smaller movements, especially those driven by pocket watch sized movements as in Consolidated, Bankers Dustproof and some Yale's I use Mobius 9010 throughout. Next photo, the two main plates are mated, this looks tricky and guess what, it is! After reassembly I check for freedom of movement and pivot play. As the saying goes "If it rattles, it'll run." This is more apt for full-sized clocks but the concept holds. Next I wind the spring one or two clicks. The movement should start right up and the balance wheels have a good amplitude, generally it should be greater than 360 °. Once run down, the rest of the wheel pivots are oiled. I use an oiler to be sure only the right amount is applied: general rule, less is better.
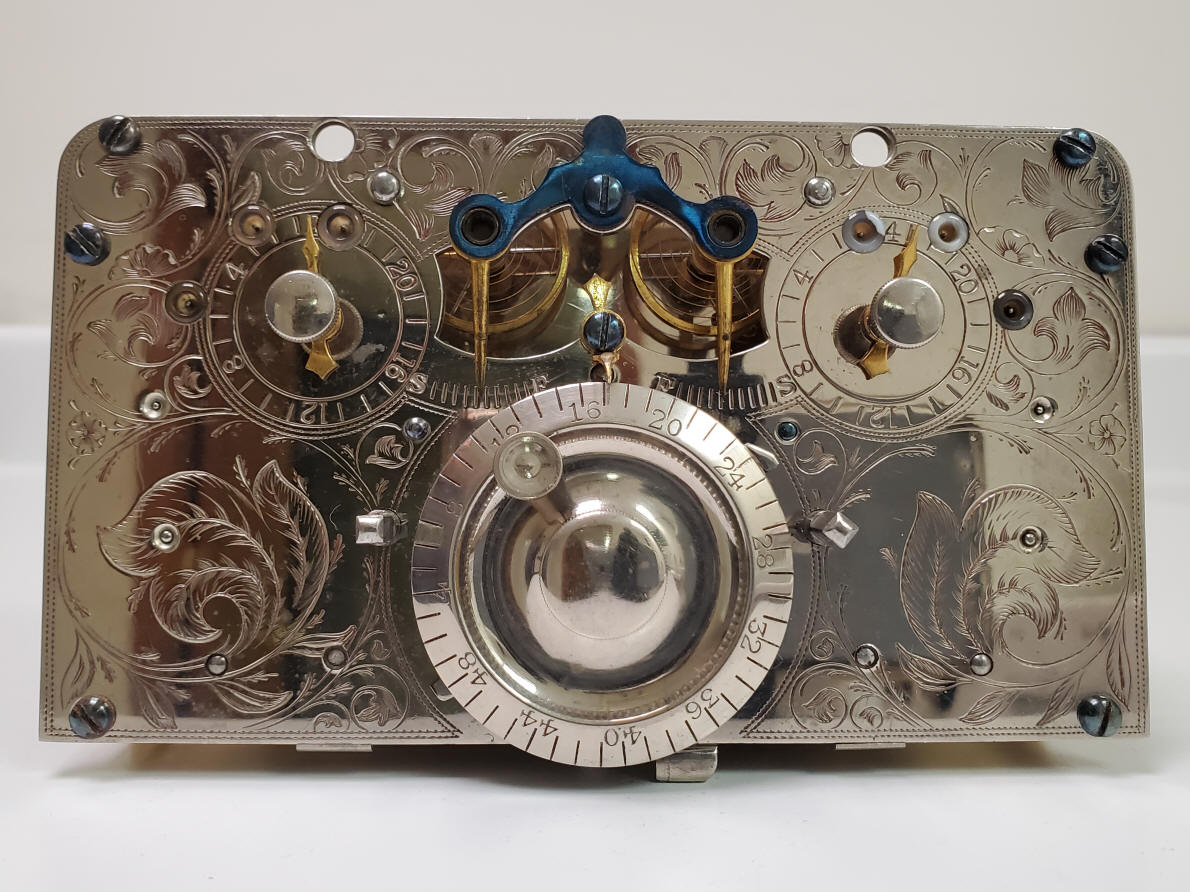
The completed movement, front elevation. Pivot "jewels" are made of agate. At this time synthetic ruby was not yet invented so using a natural ruby of this size would have been cost prohibitive. There are examples of this same movement made without jewelling which from an esthetic perspective is better, but was probably found to make the movement unreliable.
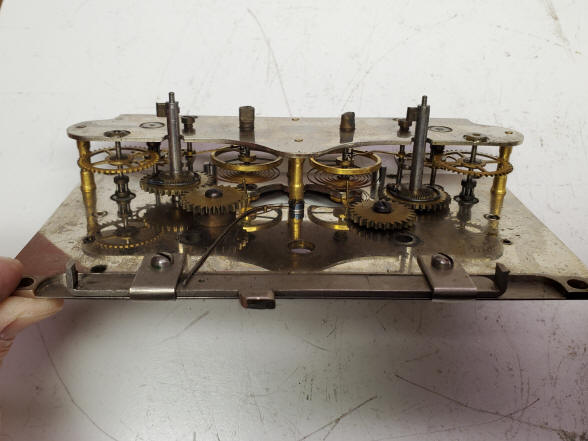
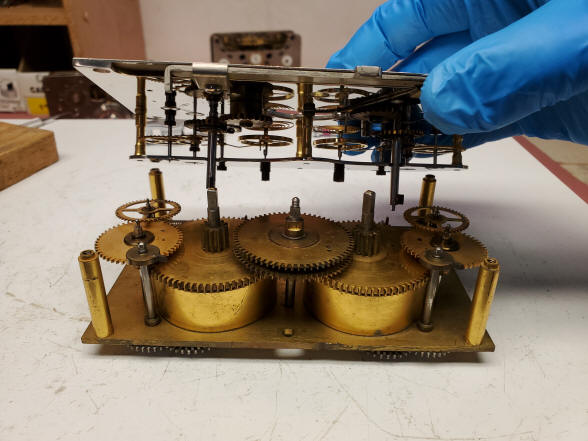
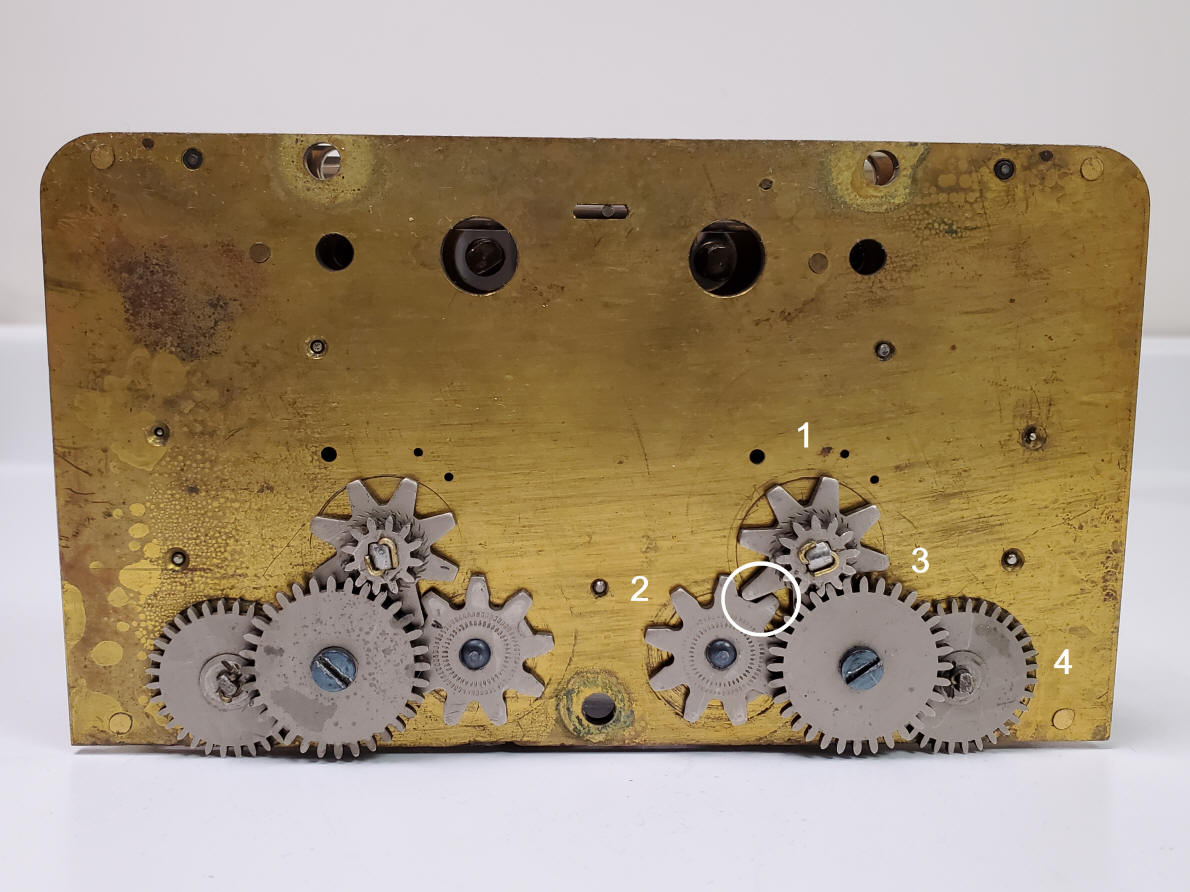
Rear elevation, before disassembly. I forgot to get a shot of the cleaned rear plate before the lock was totally reassembled. The plate was cleaned but not polished, there is no need for this given it will not be seen, and polishing always reduces some material from the artifact. These wheels perform the functions of preventing over winding through the use of Geneva stop wheels 1 and 2. The fail-safe release bar is controlled by a cam attached to wheel 4. Wheel 4 is synchronized through the removable wheel 3 to the main barrel arbor 1. The fail safe release is activated in the event the normal release through the setting dial fails. The release is activated when one or both movements run all the way down.
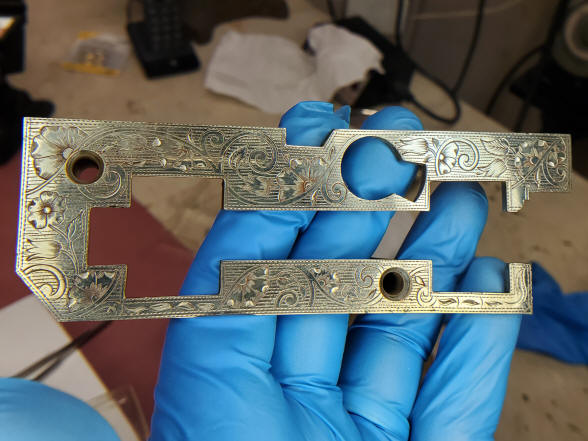
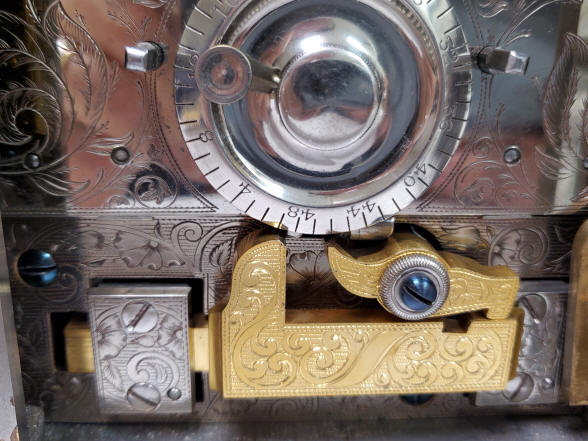
First photo shows the plate surround for the sliding bolt to the bolt dog. Next a magnification of that plate showing the detail of the engraving as well as the rouge used to highlight the design.
I now begin reassembly of the lock. Next photo shows a close up of the slider and its lock (currently shown slid all the way leftward and unlocked and thus allowing the dog to slide downwards putting the lock off guard. These components are gold plated.
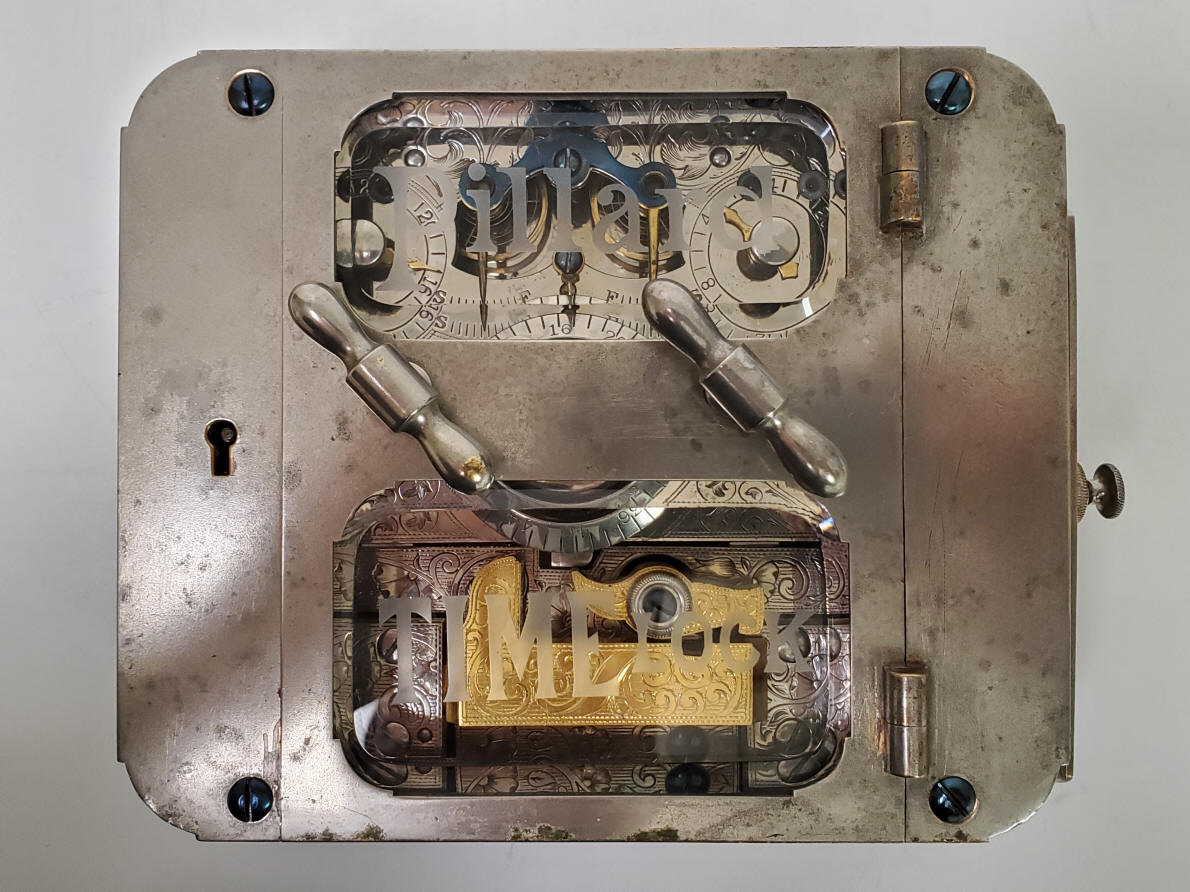
Completed time lock, front elevation.
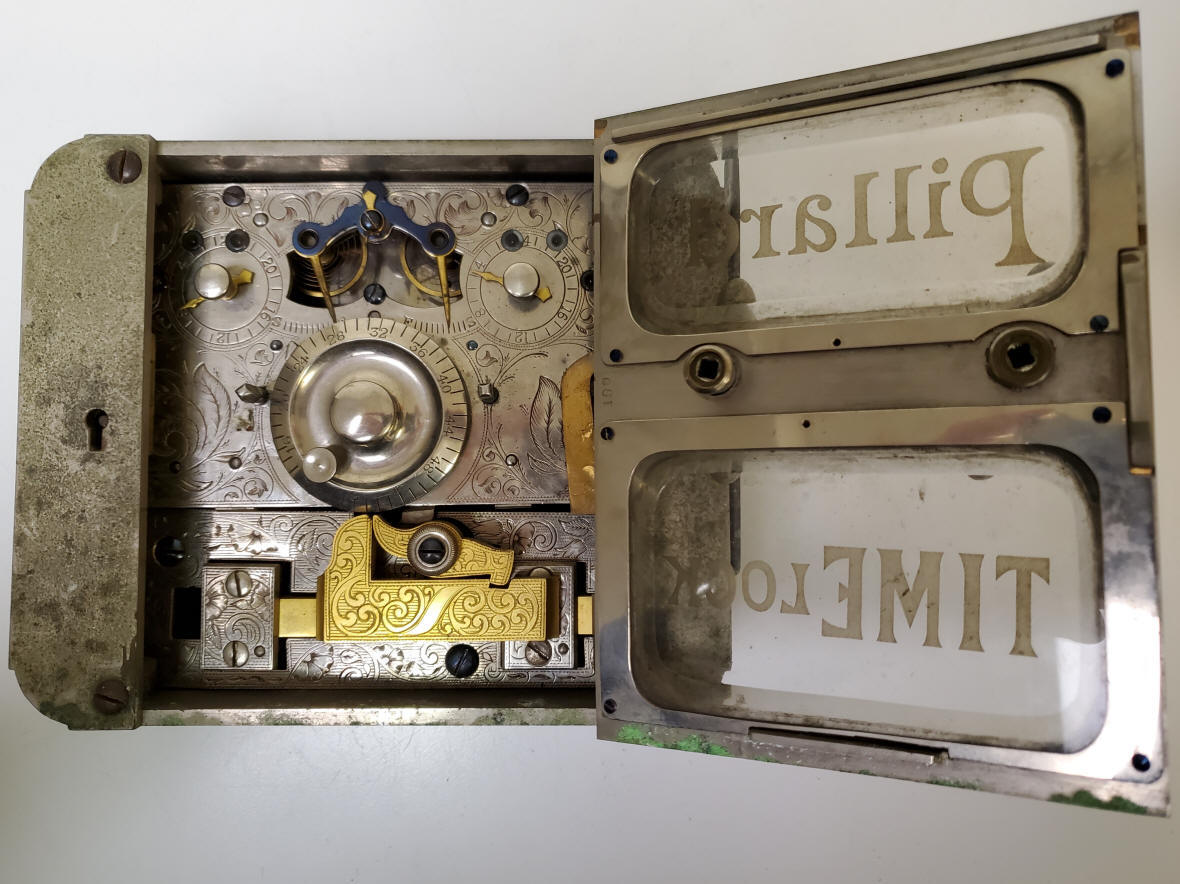
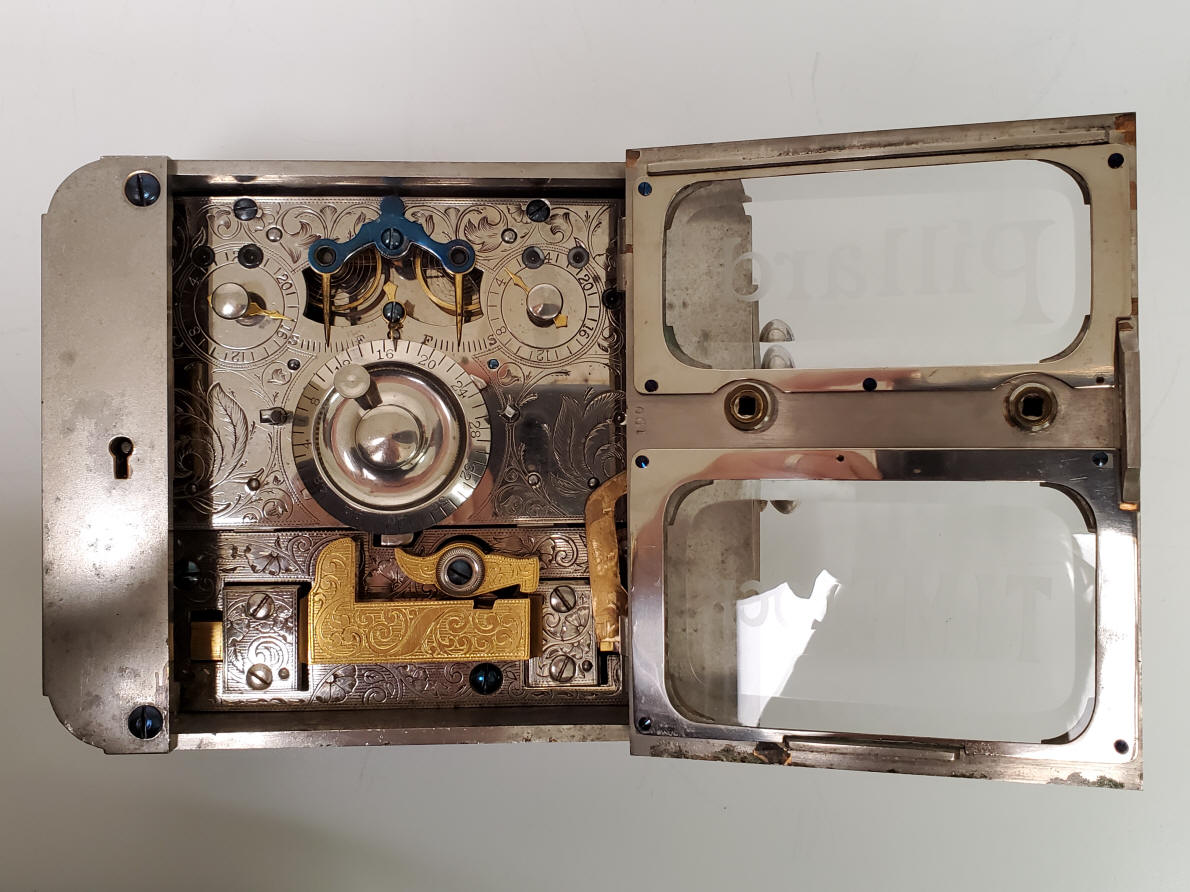
Completed time lock, door opened.
Door and its side panels removed to allow full view of the decorated plates. Pillard model #3, c. 1875. New Britain Bank Lock introduced their Oliver Pillard-designed time lock in 1875. Based on two forty-eight hour (this example) or fifty six hour high quality un-jeweled movements made by Laporte Hubbell, Forestville, Connecticut. 5 1/2"h x 6 5/8"w x 2 5/8"d, case #190, movement unnumbered. file 356 |


![]()