


Preparing for shipping and the development of the Operations Manual -
June 2022
This month the clock is being prepared for shipping. Buchanan has also
created a set of videos to help me unpack, reassemble and set up the
machine.

 The main crate with the clock is shown in the first photo. Notice the
careful way the main machine is packed. It is surrounded by a steel cage
that has clear plastic on all sides. The plastic performs two important
functions. First it keeps any dust and particulates off the machine. Every
crate is filled with particles from the sawing of the wood to the packing
materials. If the artifact is not somehow protected, either with a plastic
surround in the case of a larger machine, or in a plastic bag for a smaller
item it will coated in a layer of dust. I have learned this lesson the hard
way.
The main crate with the clock is shown in the first photo. Notice the
careful way the main machine is packed. It is surrounded by a steel cage
that has clear plastic on all sides. The plastic performs two important
functions. First it keeps any dust and particulates off the machine. Every
crate is filled with particles from the sawing of the wood to the packing
materials. If the artifact is not somehow protected, either with a plastic
surround in the case of a larger machine, or in a plastic bag for a smaller
item it will coated in a layer of dust. I have learned this lesson the hard
way.
Second, if an inspection is required by authorities they can see and test
it, say for explosives, drugs, etc. without having to touch the metal. This
avoids damage as well as fingerprints.
The entire cage is bolted to solid 1/4" aluminum plate. That plate is then
floated on rubber shock absorbing material. A set of videos was made to show
exactly how to unpack and remove the cage.
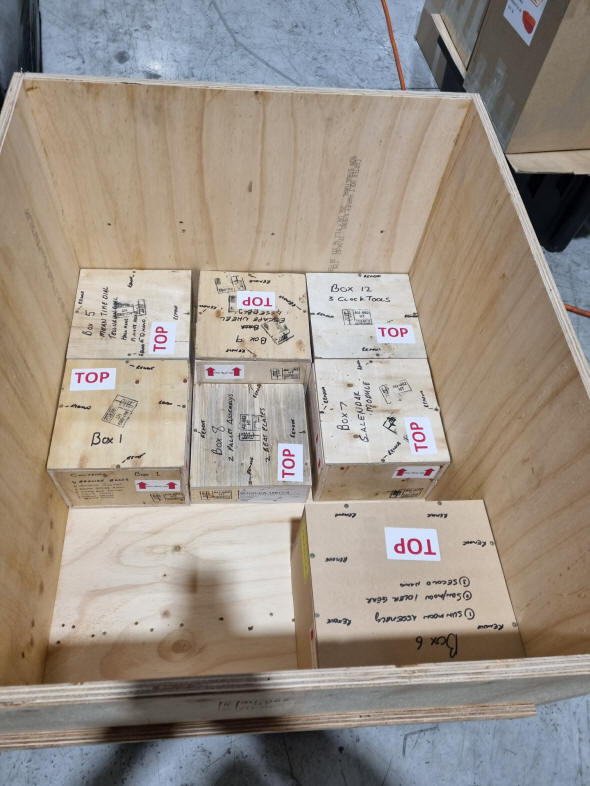
The next photo is
the second crate containing an additional thirteen small crates that contain
the various complication modules and other pieces that will have to be reassembled upon
delivery.
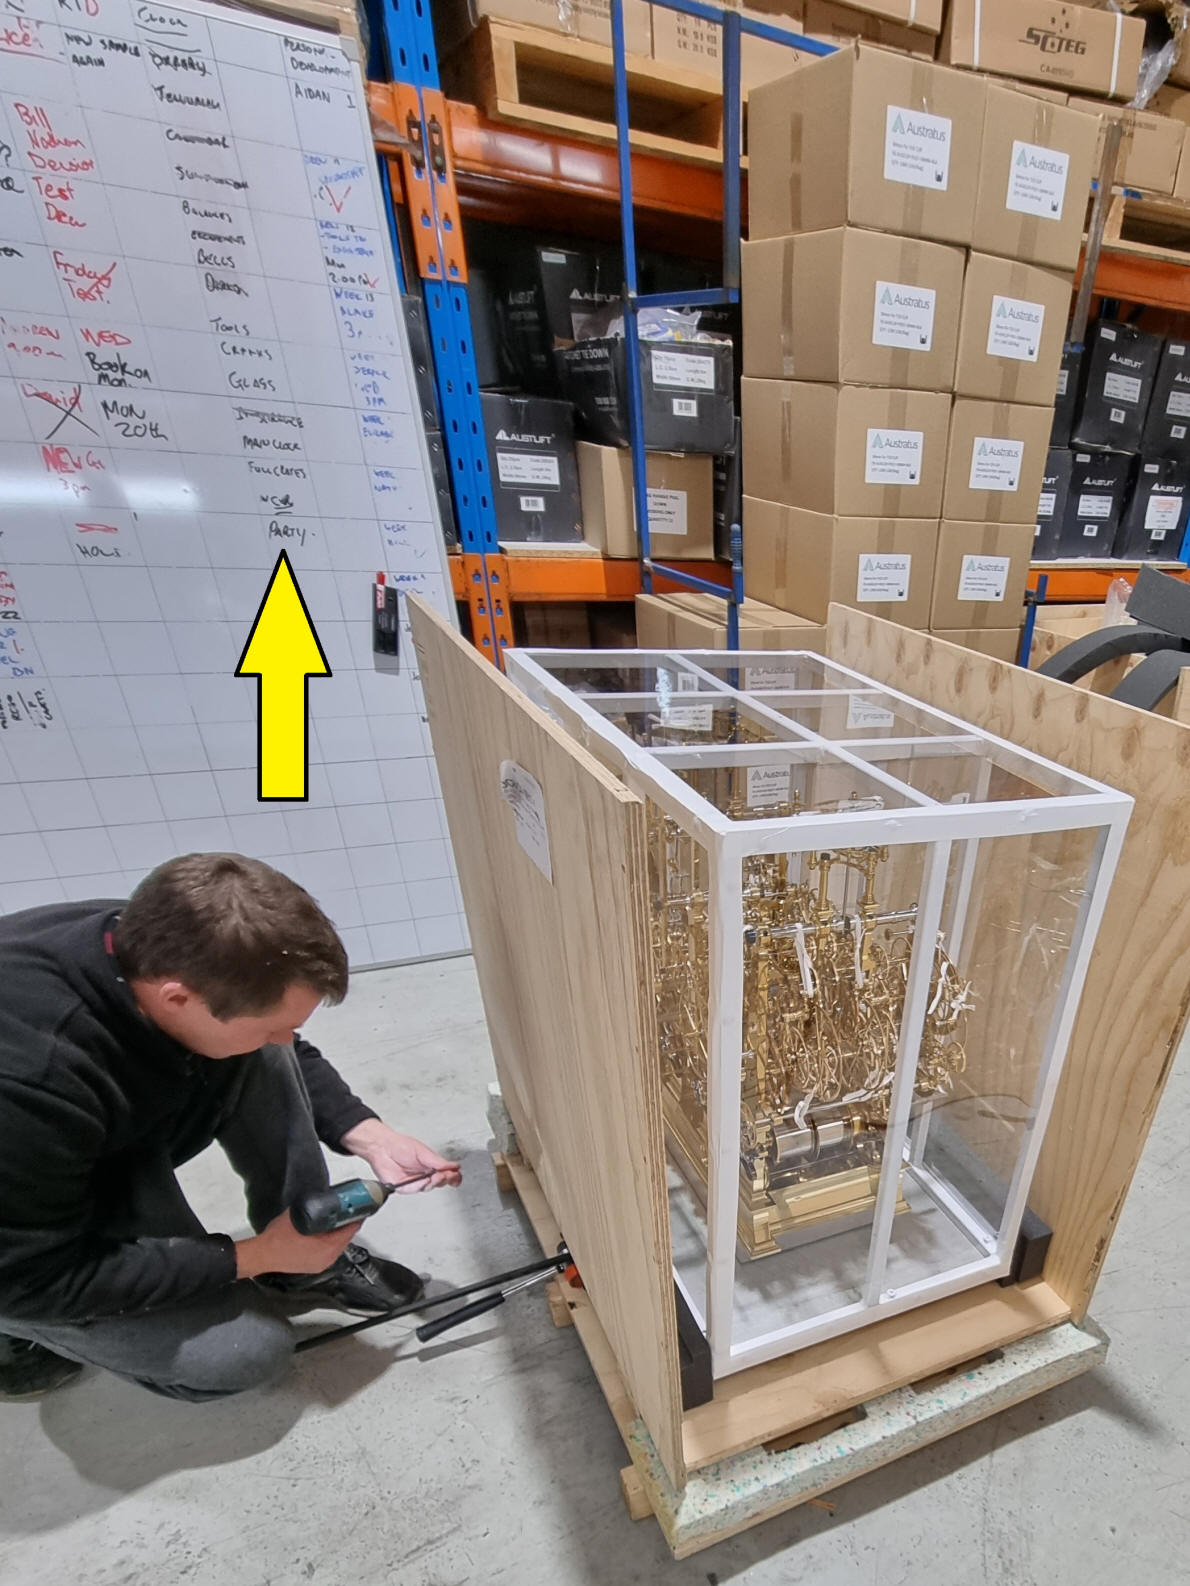
Here the main crate is being readied for final assembly. Note the white
board in the background and the arrow pointing to the last inscription that
reads "PARTY". There is a sense of relief that the project after so many
years is at last finished!
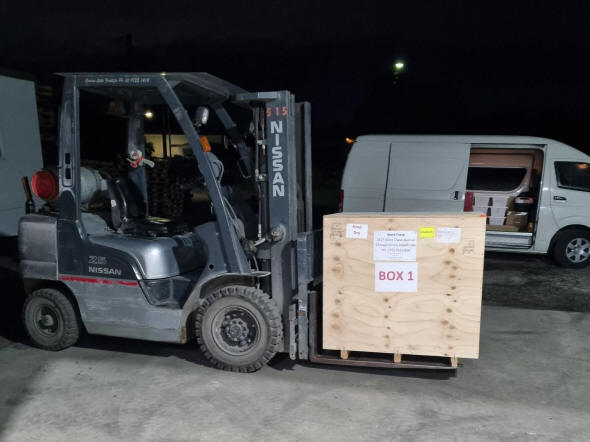

Early in the morning of June 14, 2022 the two crates are loaded onto the
truck and driven to the international shipper near Sydney. The second photo
shows the box in the shippers warehouse being moved to its appropriate
location. It will soon be on its way to the United States.
Operations Manual
Buchanan sent a
complete set of videos for unpacking and reassembly as well as instructions
as to how to set up the clock to coordinate all the complications. Section
one of the Operations Manual shows the assembly and use of
the carry frame and initial setup of the main body of the machine with seven
videos for the unpacking of the main crates (not shown). There is also
another set of video vignettes on how to assemble the clock upon arrival
found in section two. Section three describes the installation of the
clock's complication modules. Section four has a set of video vignettes that demonstrate
what is illustrated in the Operations Manual and is keyed by letter A
through N. I used these videos and explanations to create the fifty page Operations Manual
for the machine (further editing is still in progress). This information is invaluable for one to be able to
unpack, rebuild and set up the clock upon delivery. It can also be used
in reverse order to disassemble the clock if it needs to be moved.

The videos here are simply a screen capture of a scene of each
video. The actual videos will be on DVD and saved on my YouTube channel. The
DVD will be attached to the Operations Manual for future reference for the
next owner.
The video screen shots below
make up section two of the Operations Manual under the chapter titled:
Assembly of the Astronomical skeleton clock to the point of running and
before installation of complication modules.

00074. Install
the balances |

00073. Secure
balance bearing caps |

00072. Install
escape wheels and escapements |

00071. Install
cross train drive, R/H side |

00070. Install
spiral cross arbor, R/H fly governor |

00045. Secure
balance cross bands to balances
|

00044. Secure
balance springs and suspenders |

00043. Secure
balance springs and suspenders, close up |
00072.
Inserting escape wheels and escapement
pallets
|

000047. Secure
lower remontoire weight band to weight
|

00046. Secure
upper remontoire weight band to remontoire
sickle mount
|

00065. Secure
strike/repeat weight
|

00061. Install
mean time dial
|

00060. Secure
mean time dial hands; synchronize with
strike train
|

00042. Secure
balance balls |

00068. Unpack
calendar module |

00069. Install
calendar module |

00066. Unpack
Sun/Moon module |

00067. Install
Sun/Moon module |

00064. Prepare
tellurion dial, install drive wheel |

00062. Install
tellurion dial |

00068. Unpack
tellurion module
|

00051. Securing
Earth globe to tellurion module
|

00050. Securing
Earth globe to tellurion module, pt. 2
|

00049. Install
tellurion module
|

00048. Install
planisphere module
|

00057. Unpack
orrery |

00059. Assemble
misc. parts onto orrery |

00056. Install
orrery dial |

00055. Install
orrery |

AA. Use of the
demonstration keys |

A. Sun/Moon
dial |

B.
International time dial |

C. Equation of
time dial |

D. Setting
celestial train to midnight |

E. Setting
calendar to trip at midnight
|

F1. Setting
calendar - leap year calculator 1 |

F2. Setting
calendar - leap year calculator 2 |

F3. Setting
calendar - leap year calculator |

F4. Setting
calendar, remaining dials
|

G. Setting
planisphere dial |

H. Setting mean
time dial |

J. Setting
orrery components |

K. Setting
strike sequence |

L. Setting
tellurion components |

M. Setting to
local time |

N. Start the
clock |
|
